Instant Cloud Sync (S3 Setup Guide)
With Instant Cloud Sync, you can quickly synchronize clipboard content across devices and networks. This guide explains how to configure S3-based storage, using Bitiful Cloud as an example.
1. Enable Cloud Sync
- Open the app settings and find the Cloud Sync option.
- Sign in with a supported cloud service (e.g., WebDAV, S3).
- Once configured, your clipboard content will sync seamlessly across devices.
2. Register and Log in to Bitiful Cloud
Create an Account
 Visit Bitiful Cloud and create a new account.
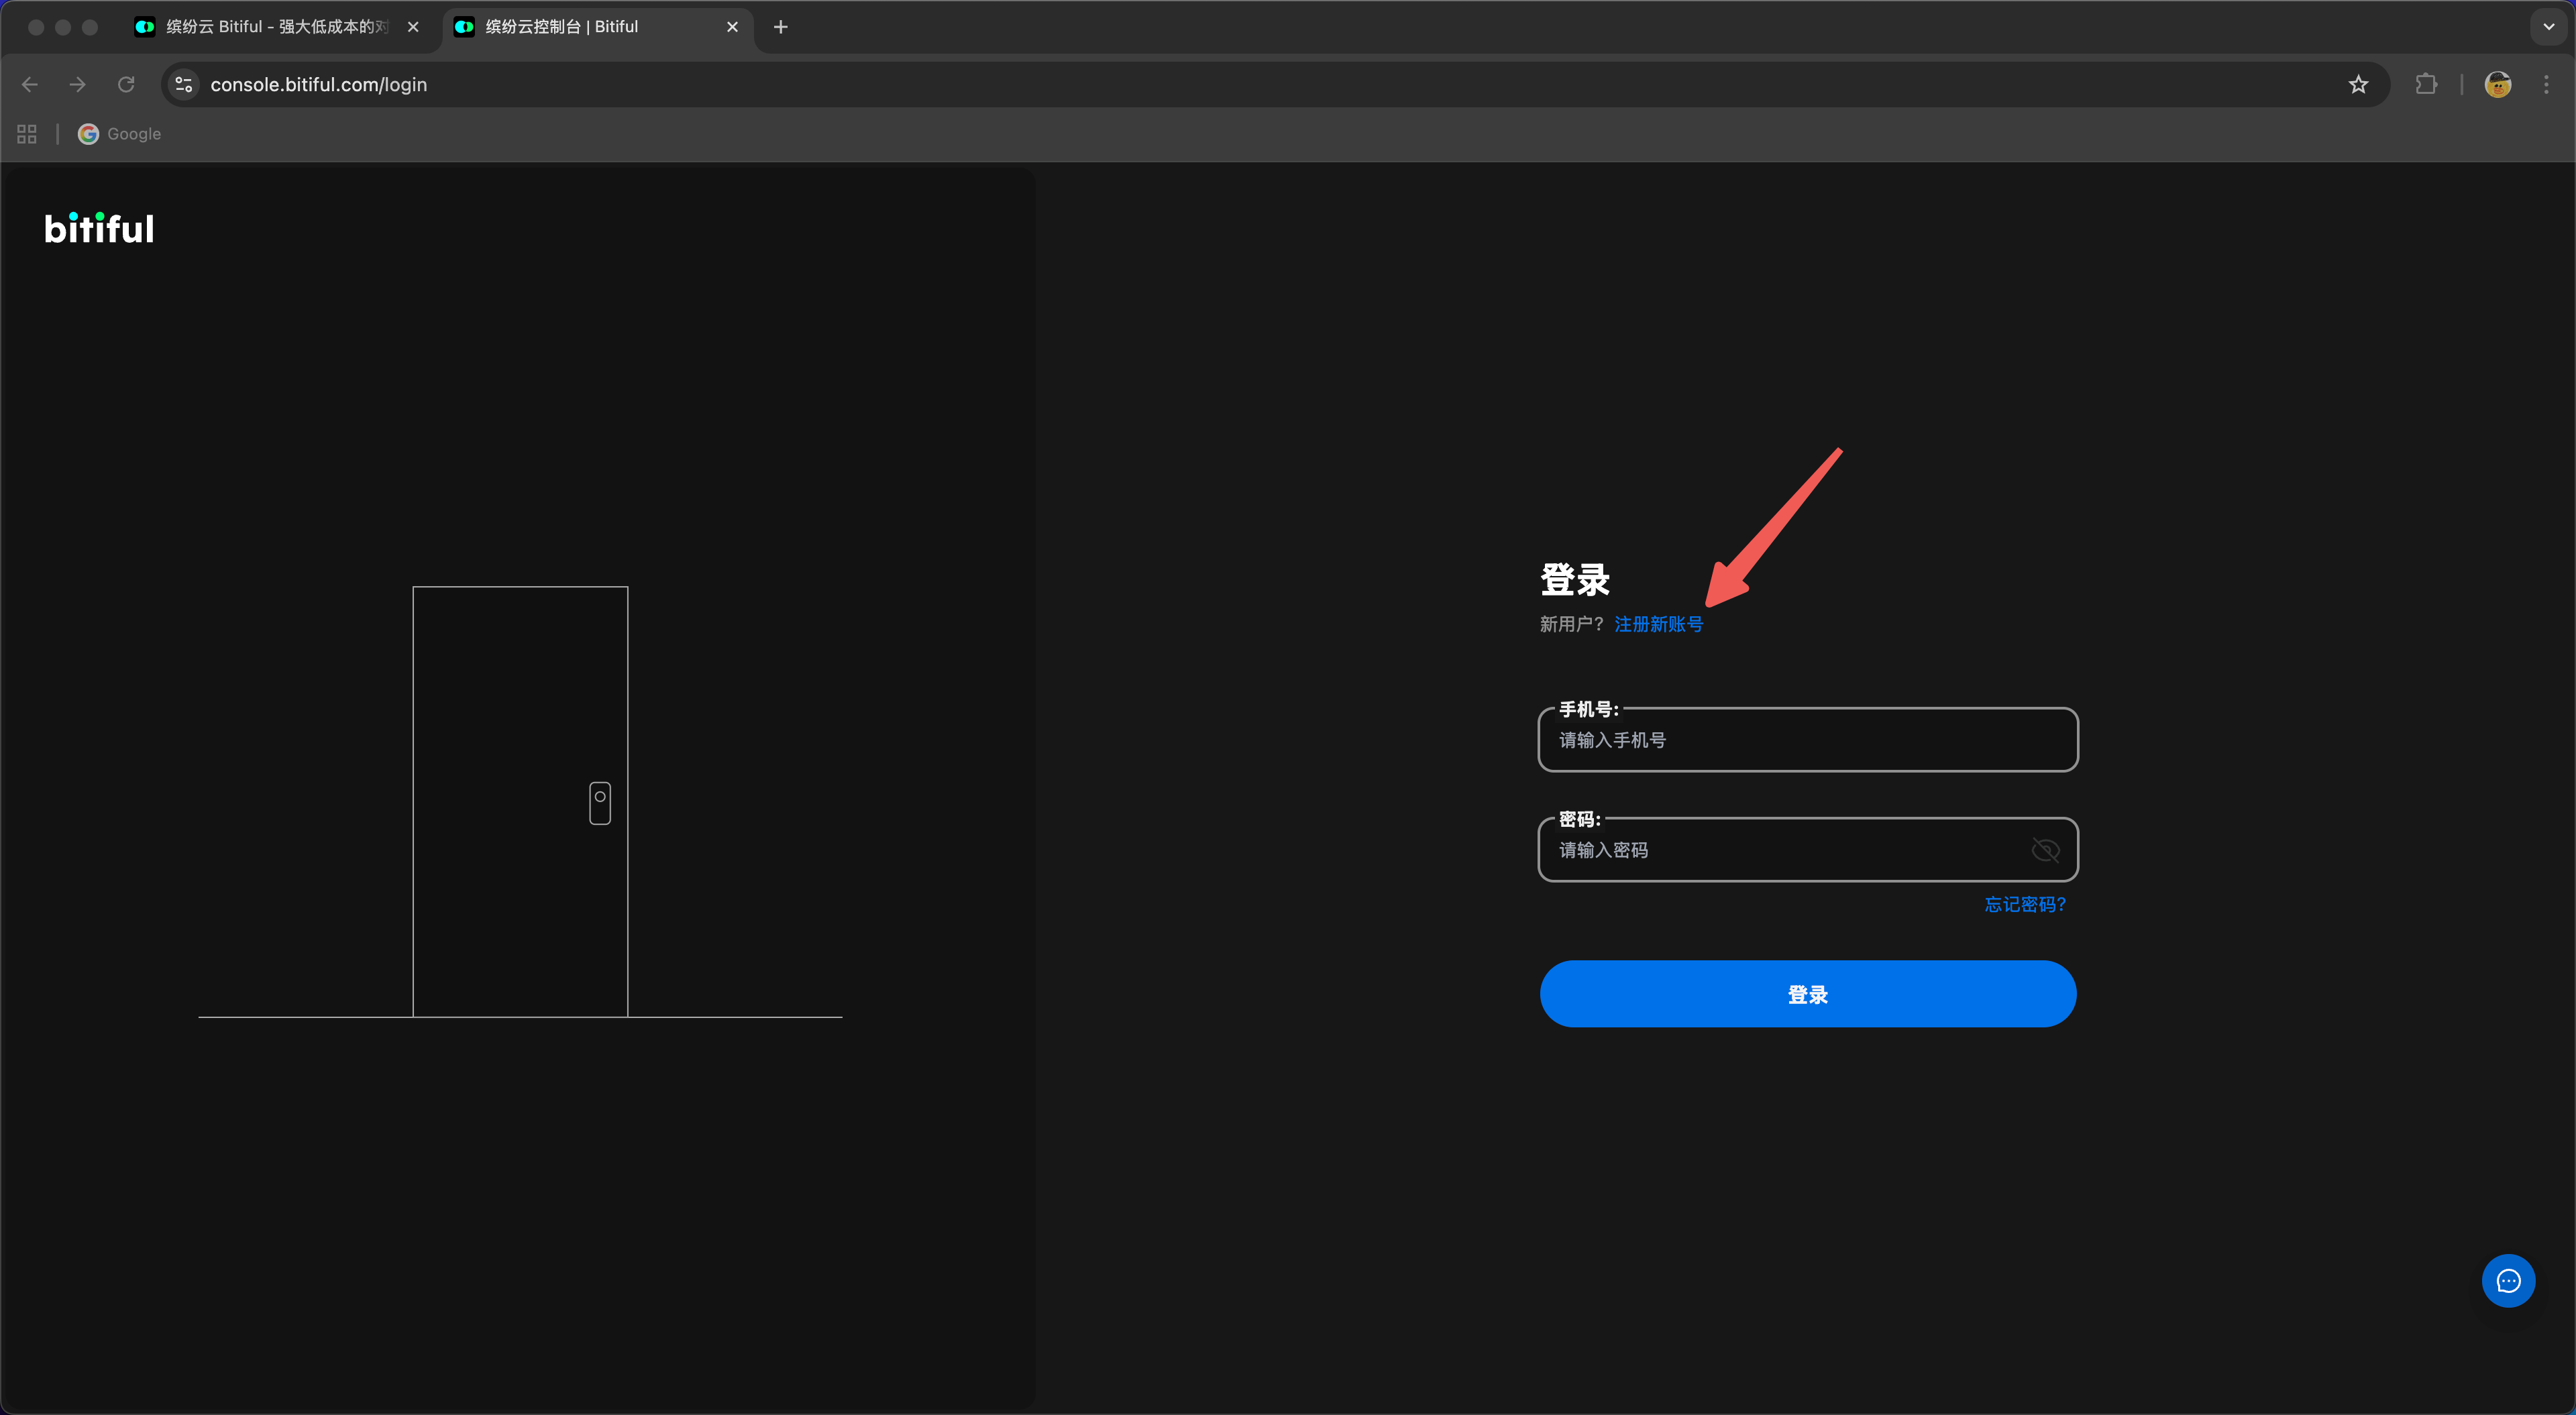
Log in to Console
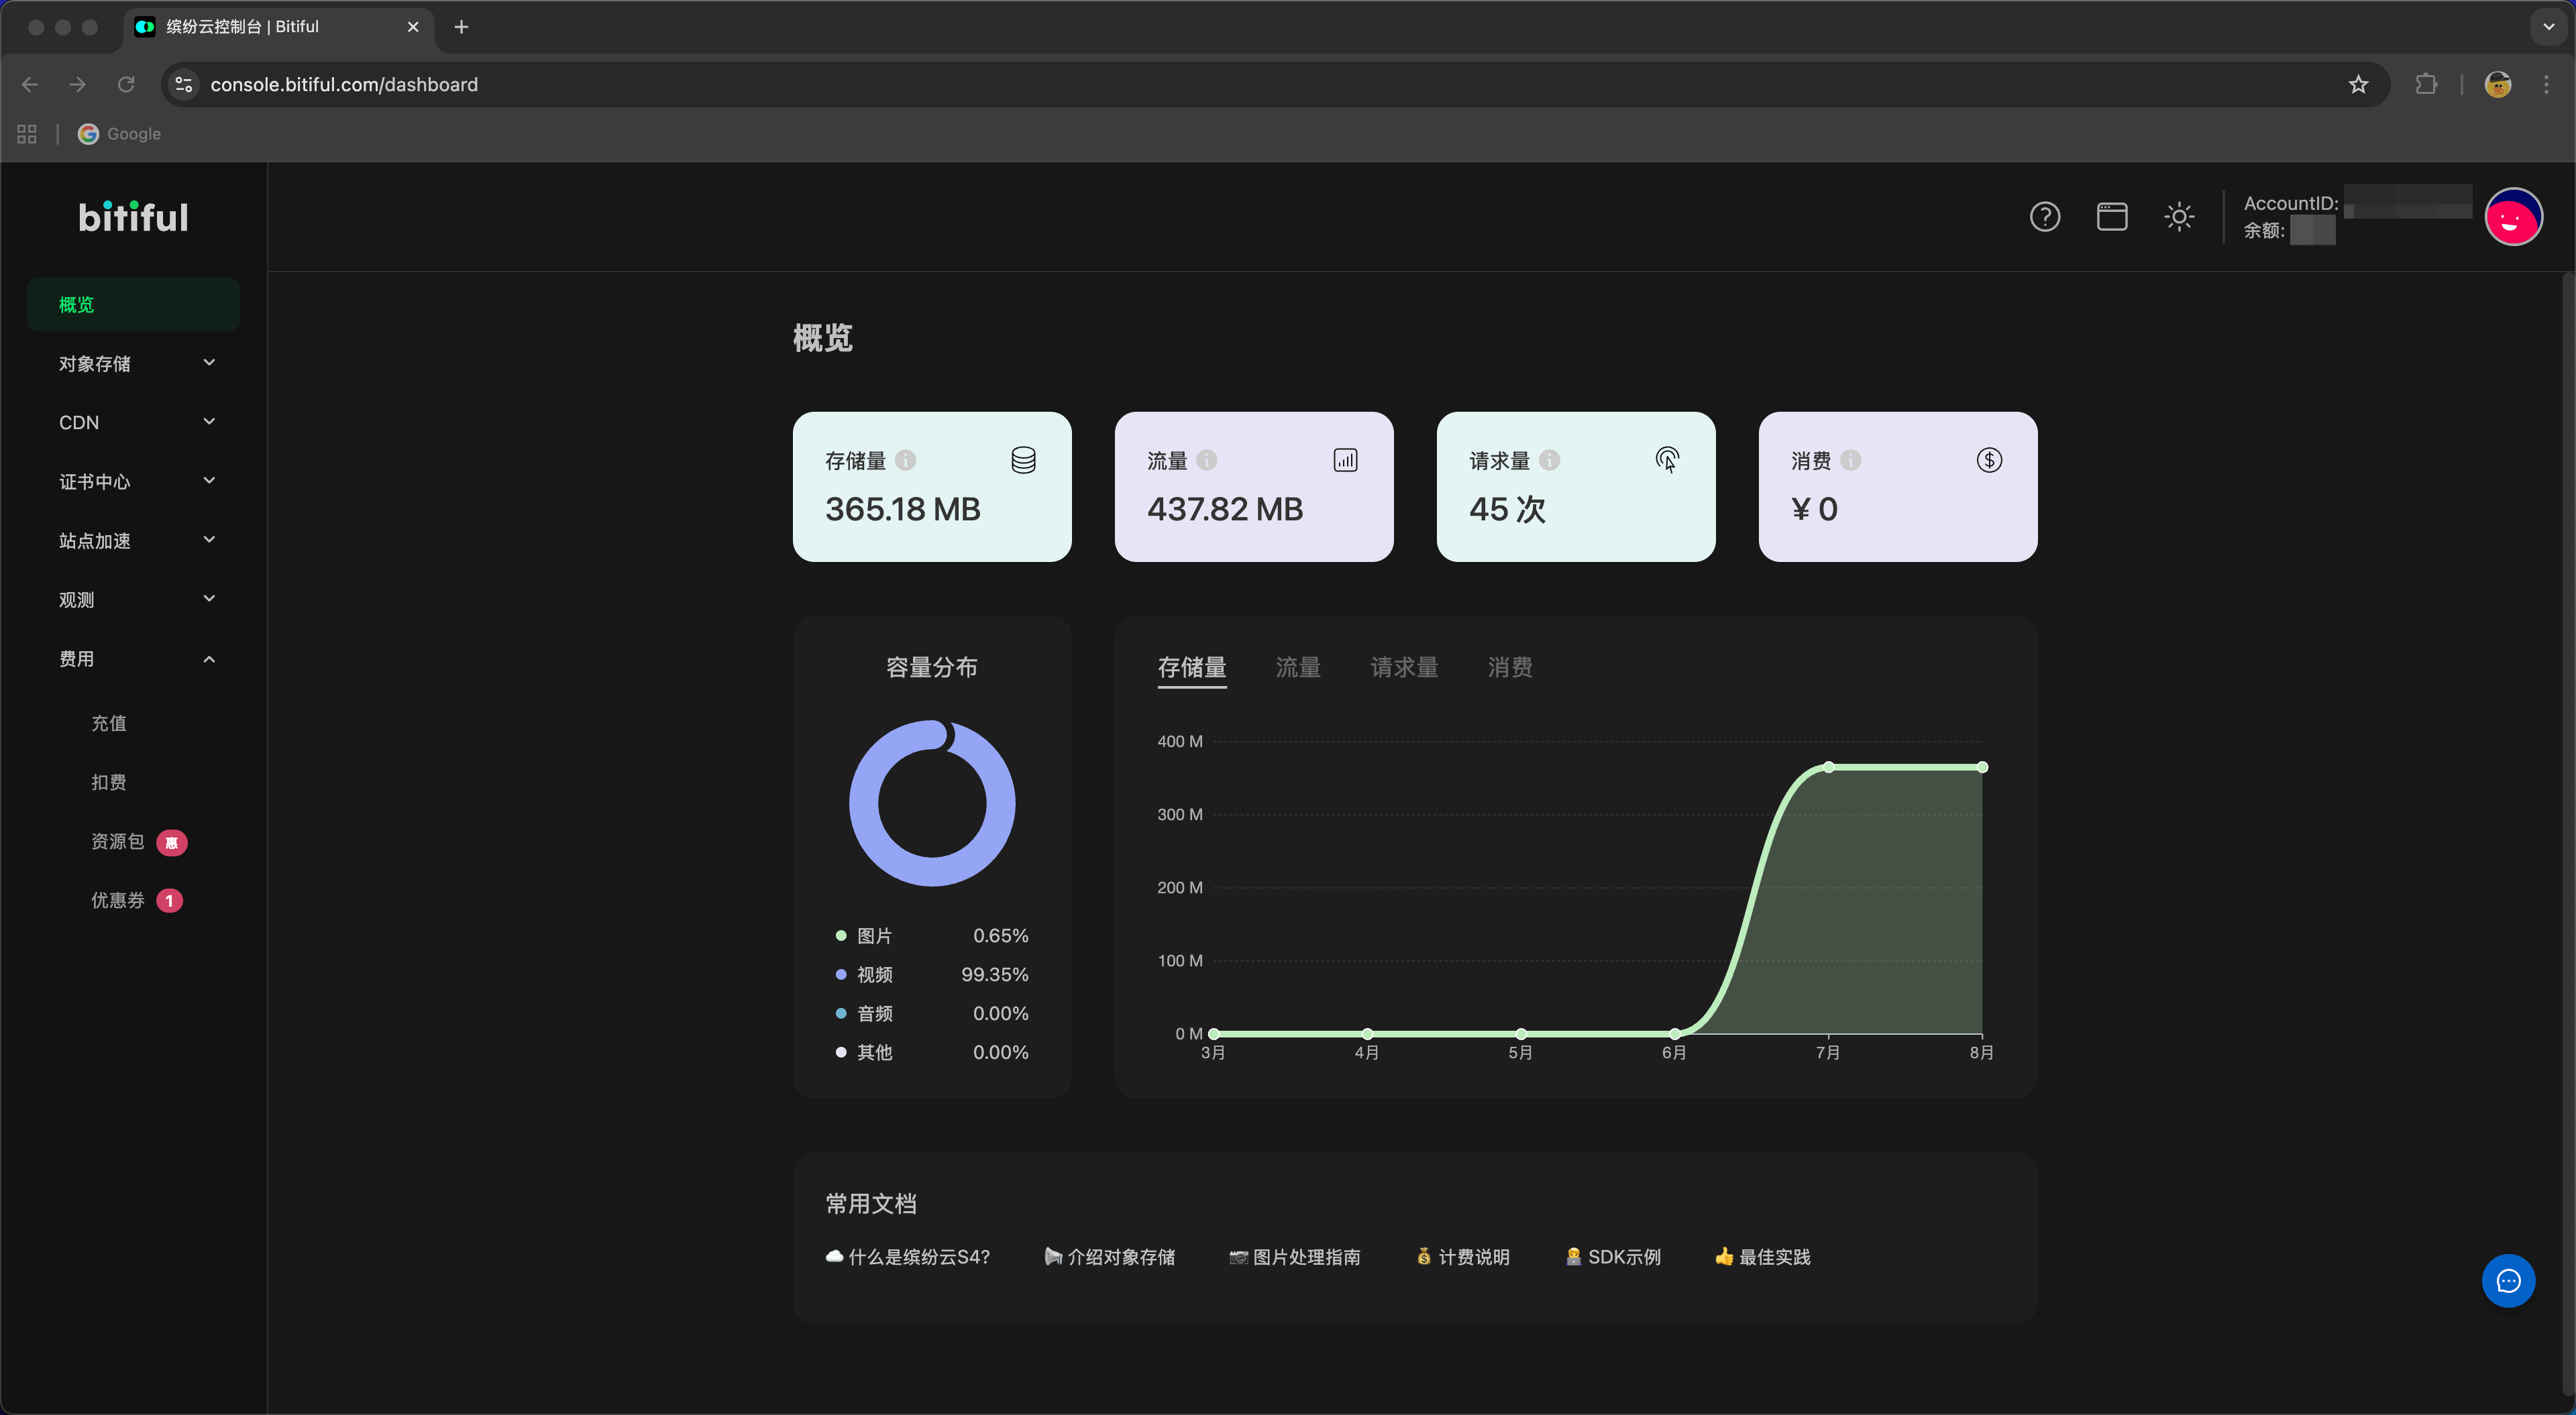 Enter your credentials to log in to the Bitiful Cloud Console.
Note
Some services may require identity verification before use.
3. Create a Storage Bucket
Bucket List
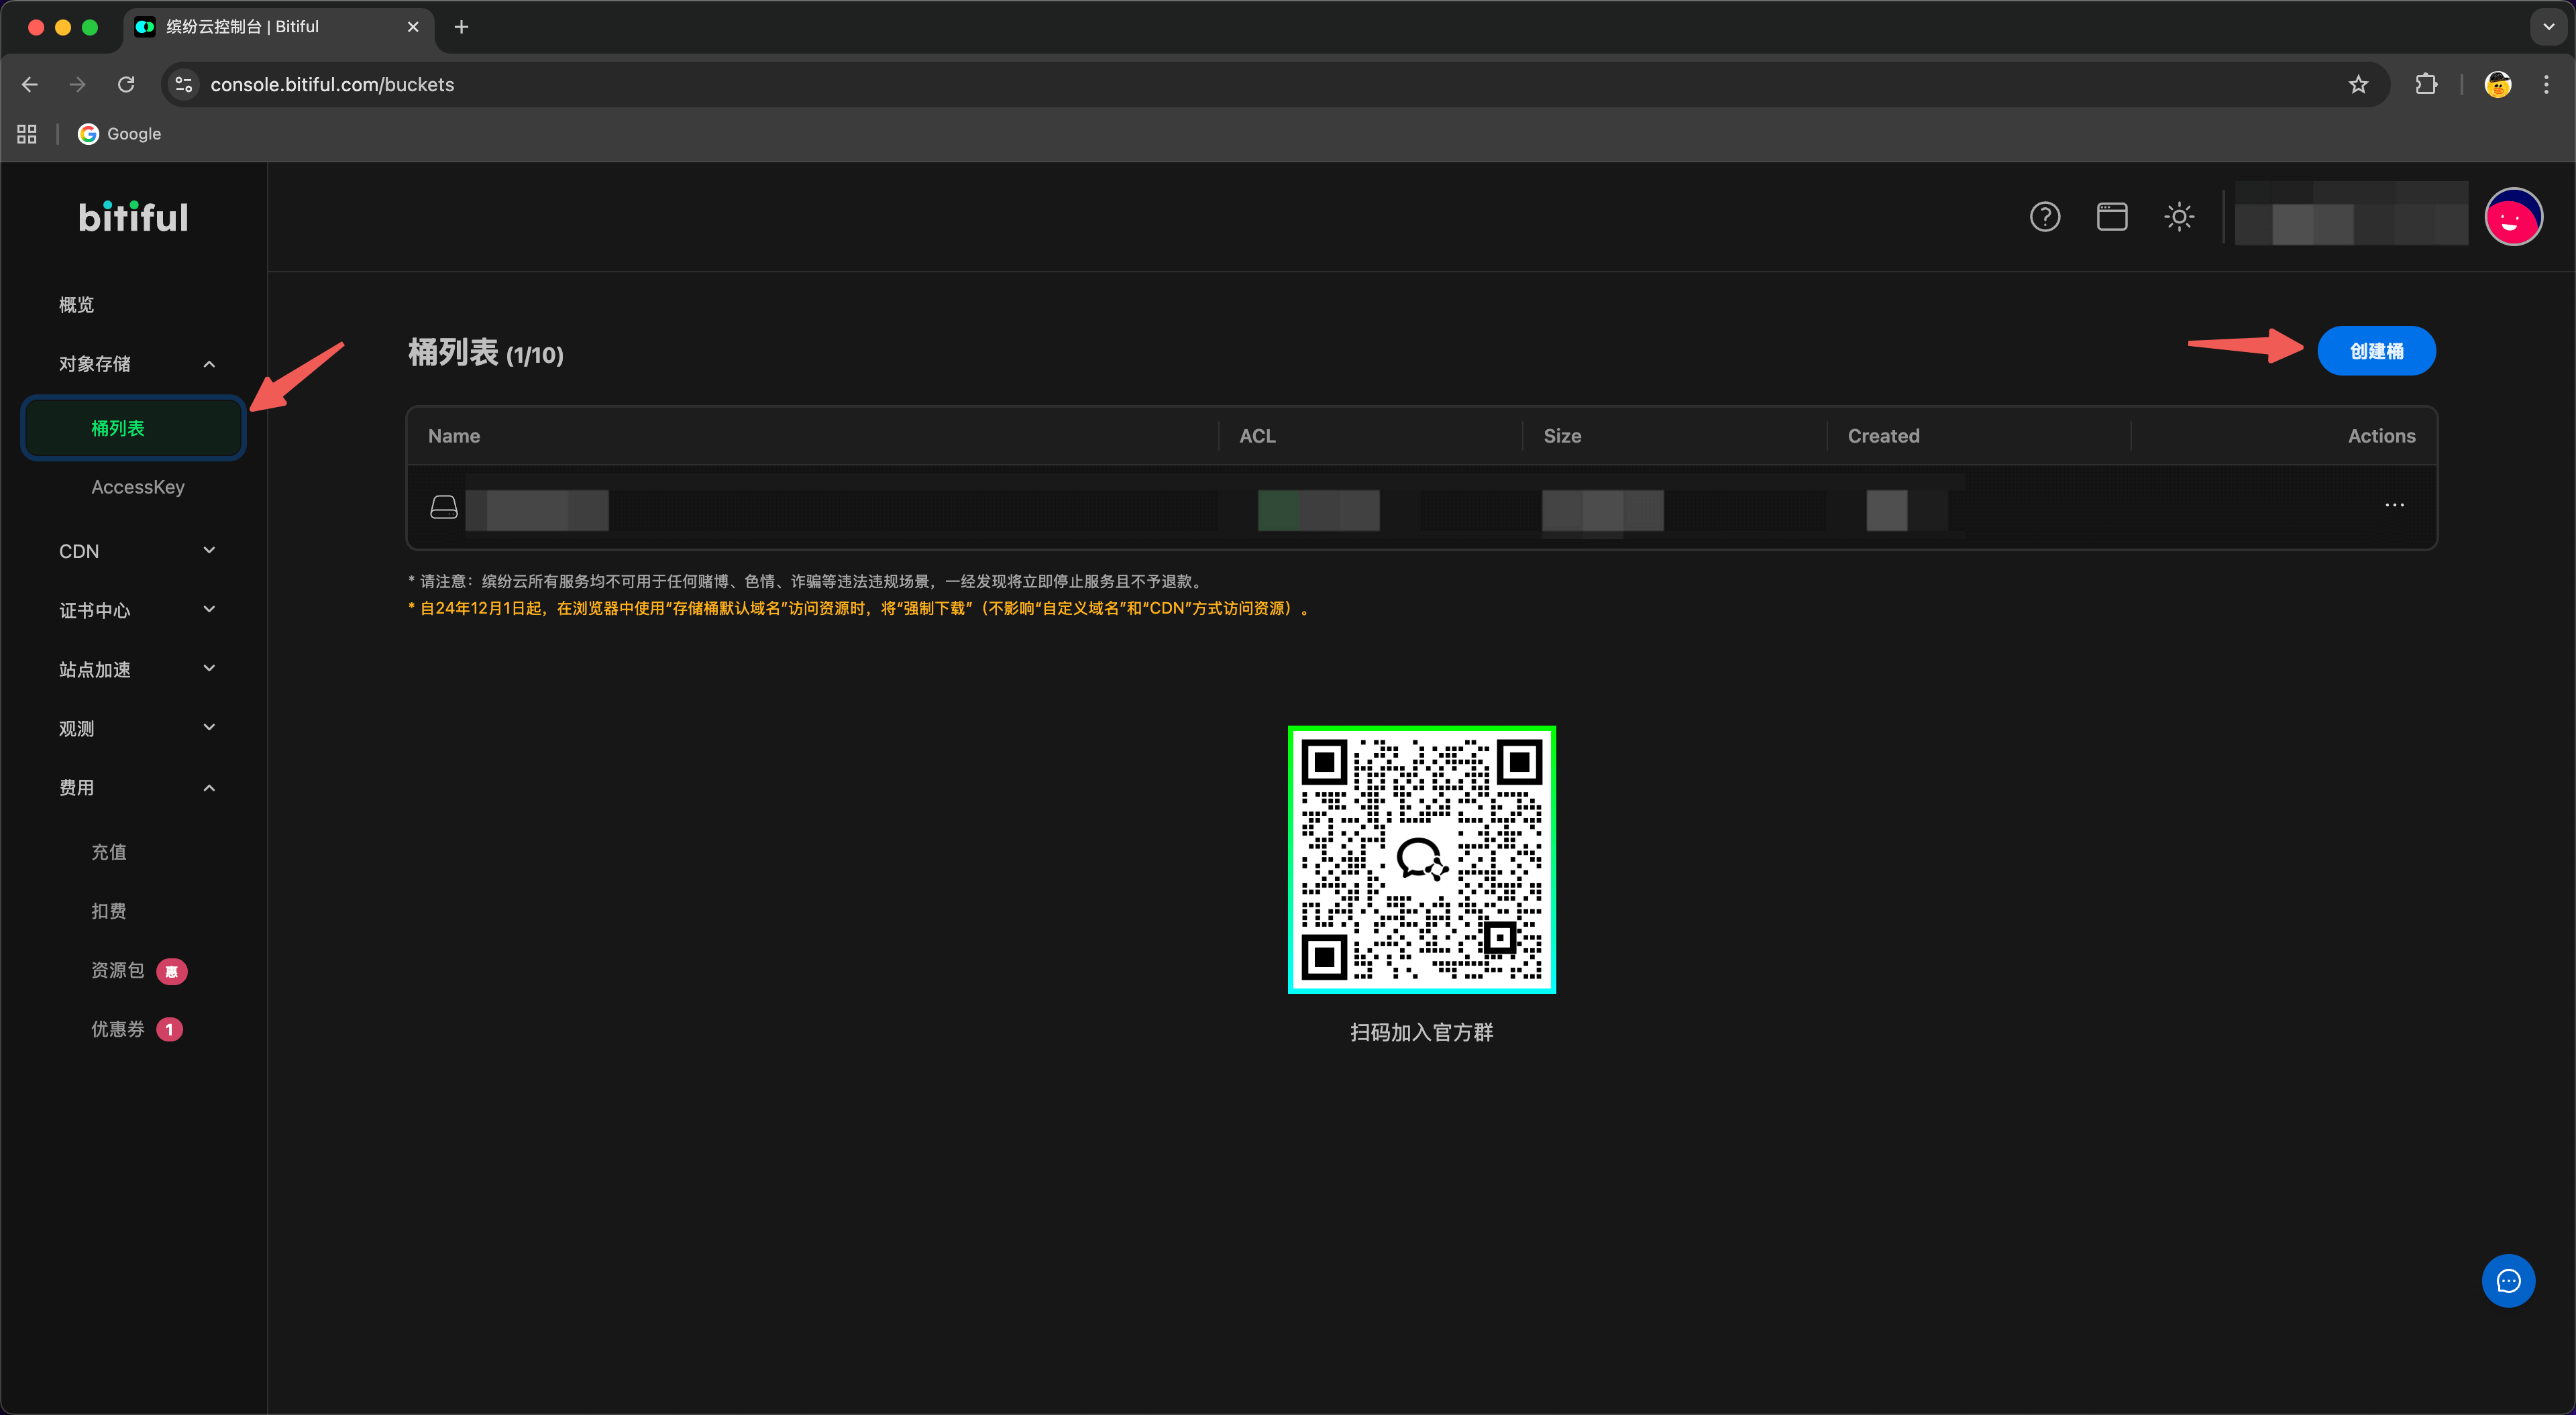 Go to Object Storage → Bucket List and click Create Bucket.
Create Bucket
 Enter a unique bucket name and confirm.
Note
Bucket names must be globally unique and cannot be changed after creation.
4. Get Access Information
Create Sub-User and Keys
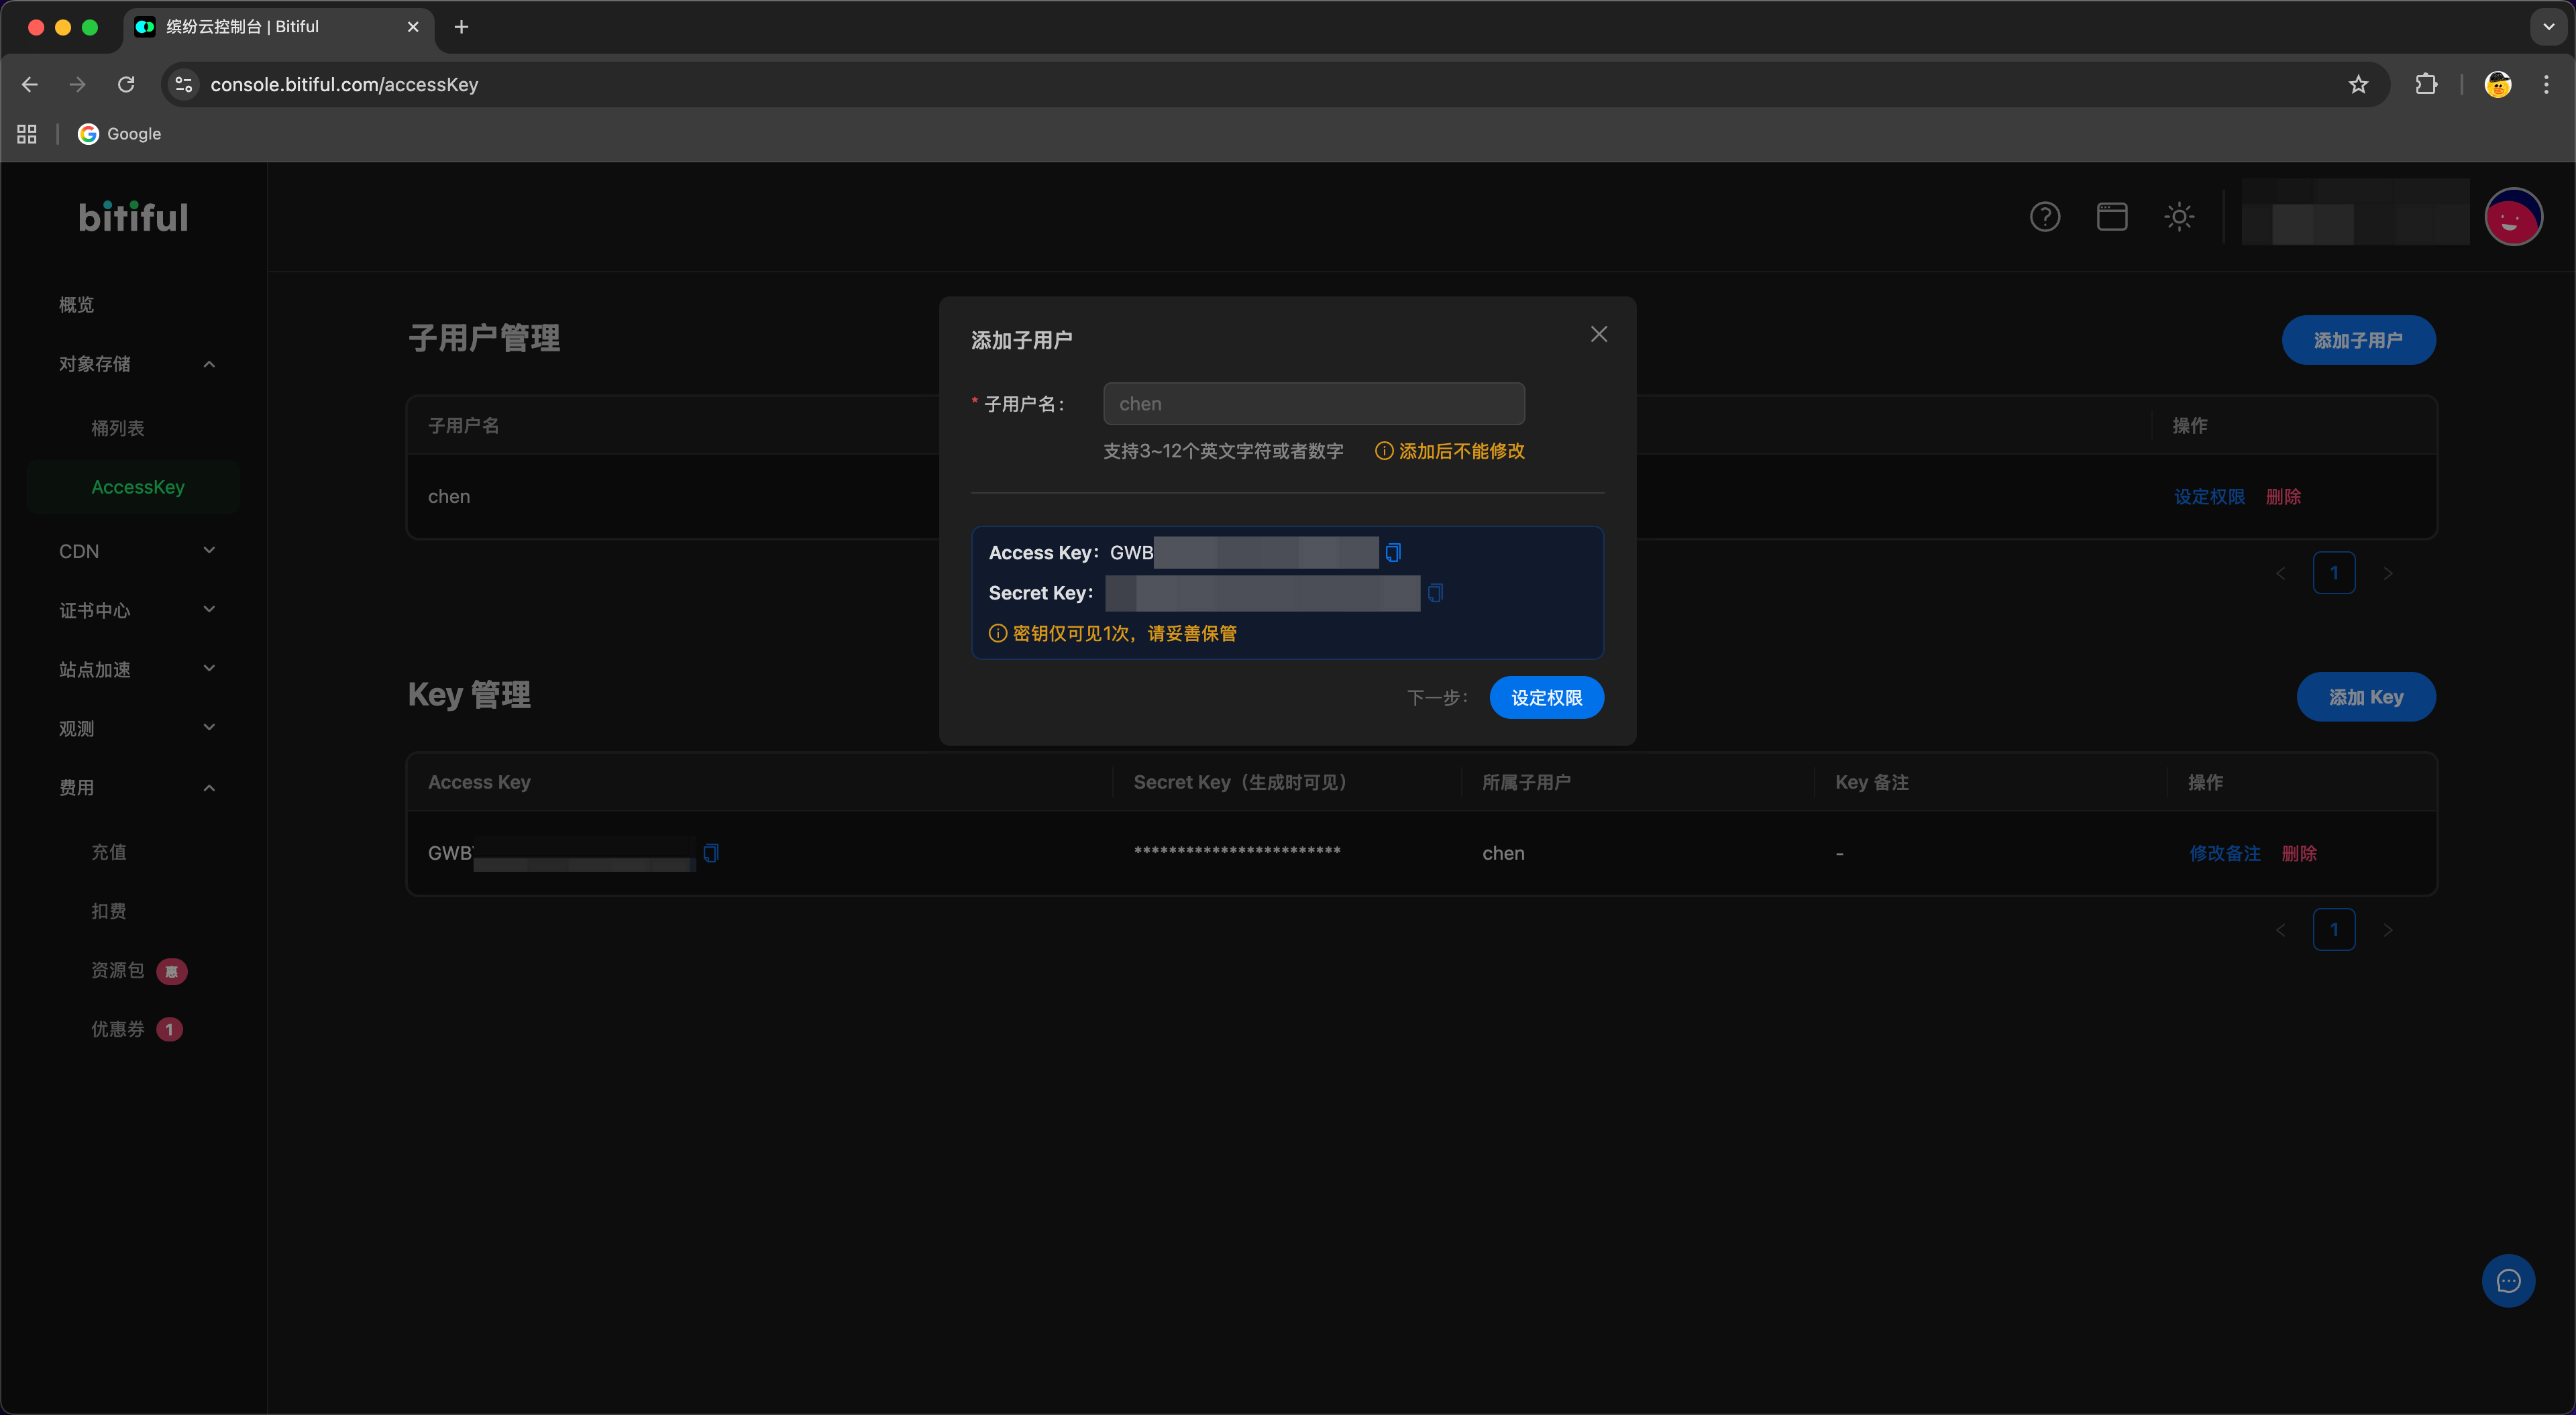 In Object Storage → AccessKey, create a sub-user under User Management, then obtain the Access Key and Secret Key.
Set Permissions
 Grant read/write permissions for Object Storage and save the settings.
5. Configure S3 in the App
Select S3 Type
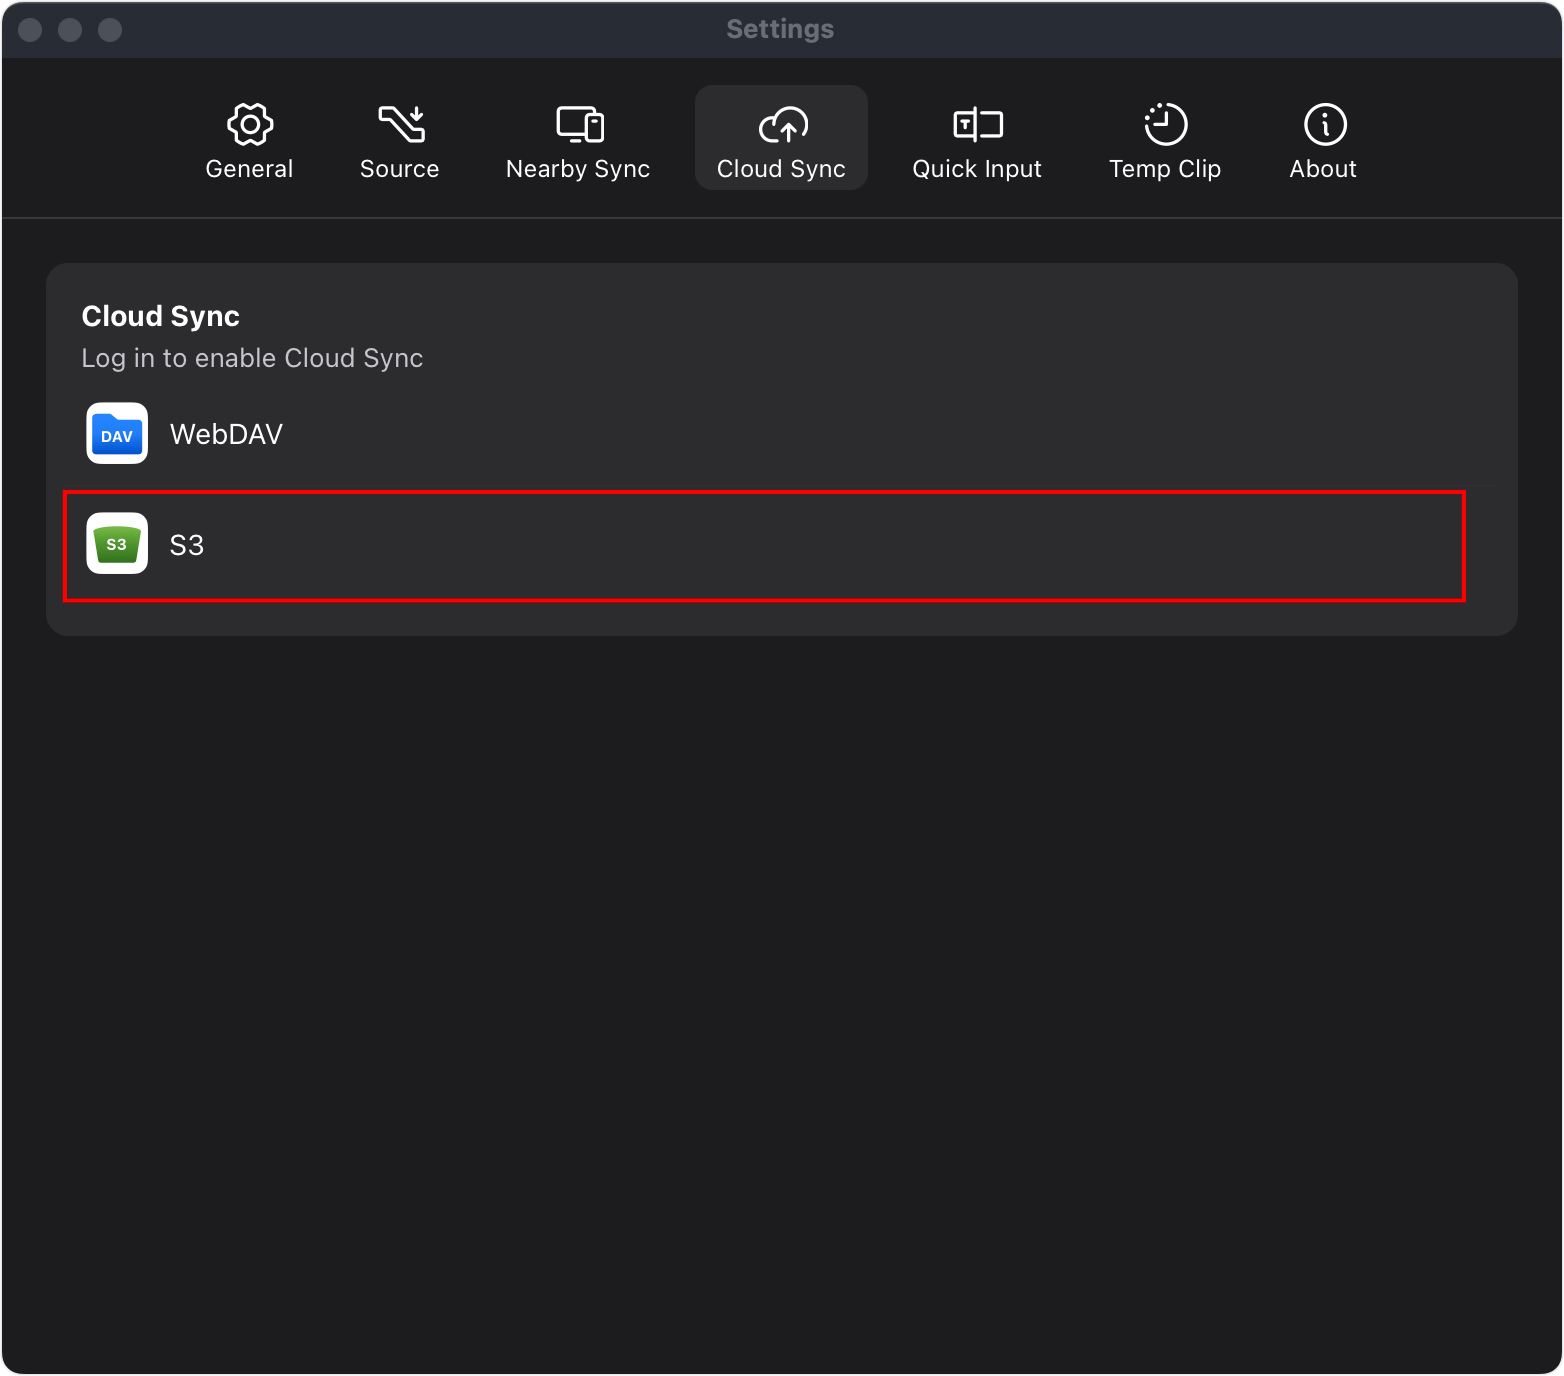 In the app’s Cloud Sync settings, choose S3 as the sync type.
Enter Configuration Parameters
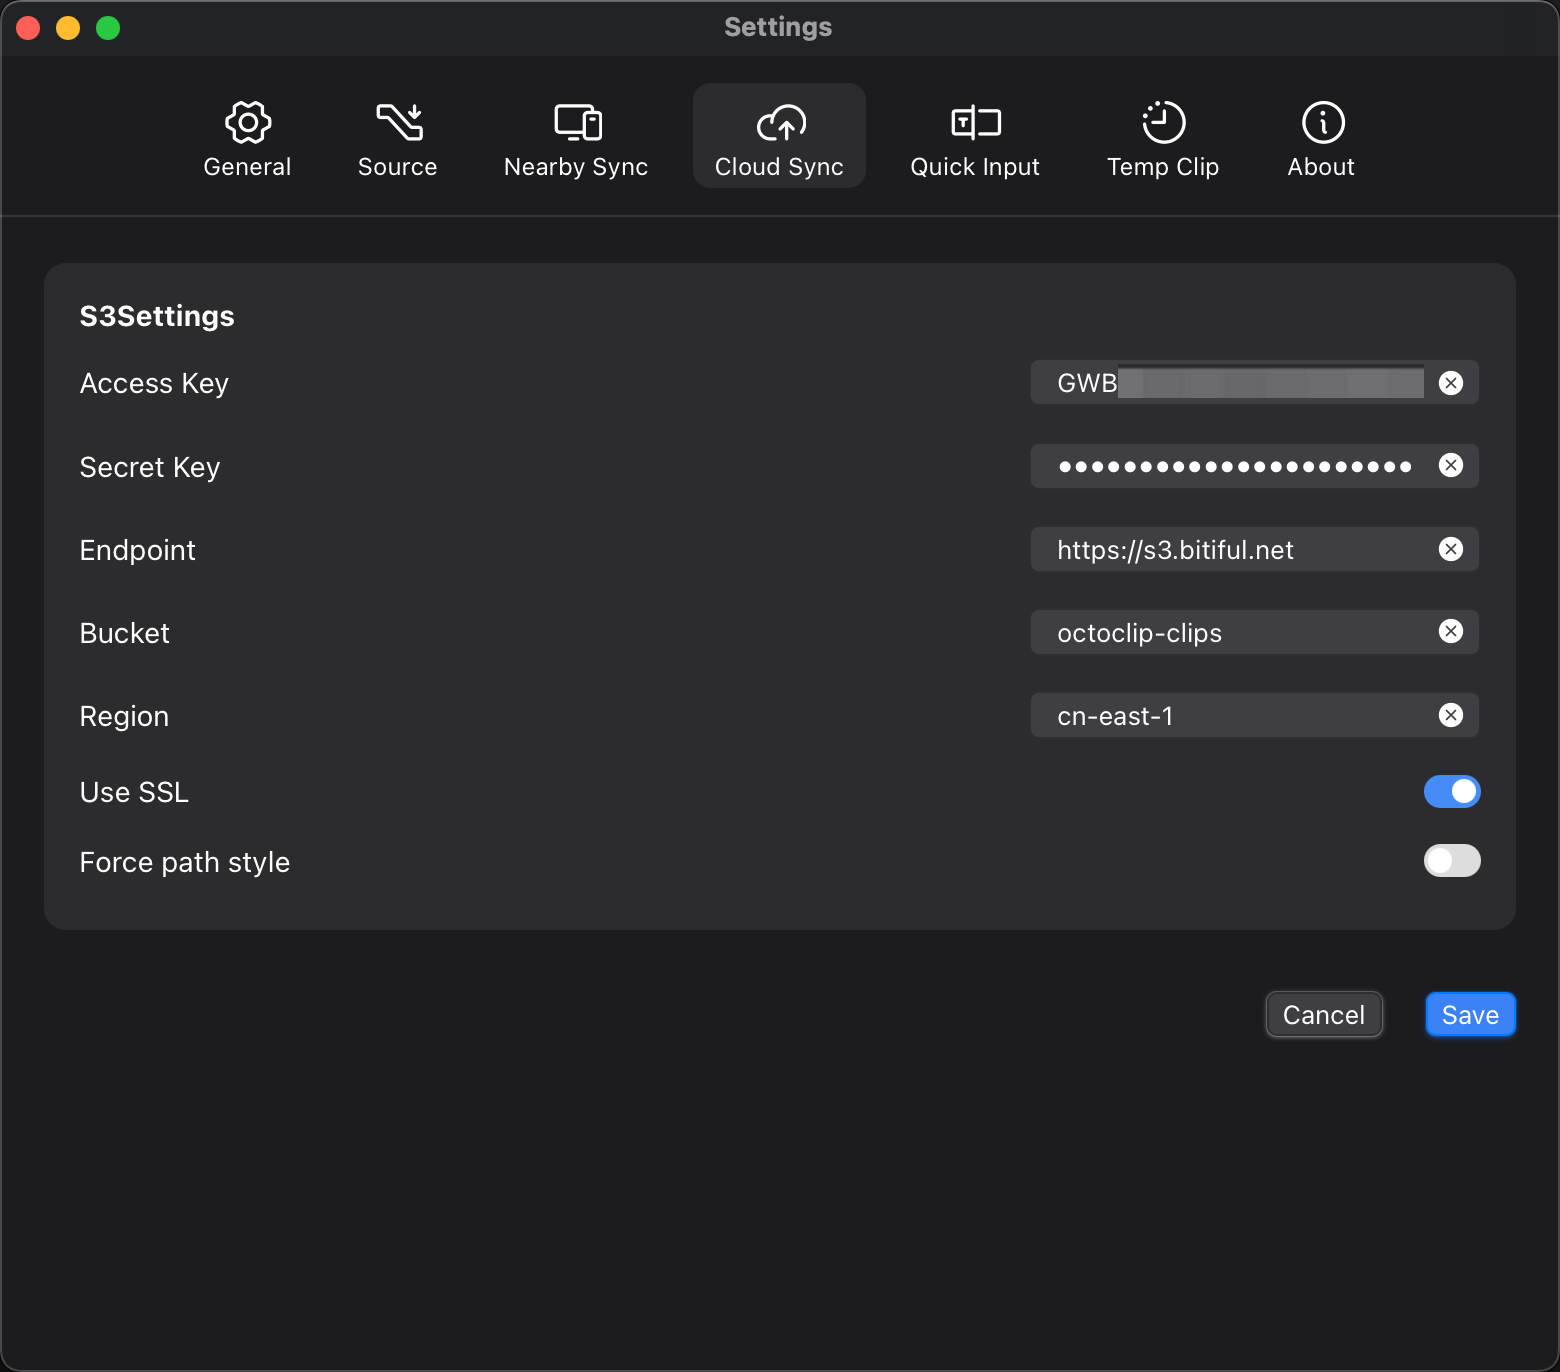 Fill in the following fields:
- Access Key: Access key generated in the console
- Secret Key: Secret key from the console
- Endpoint: S3 endpoint (e.g.,
s3.bitiful.com) - Bucket: Name of the bucket you created
- Region: Region where the bucket is located
Click OK to save the configuration.
6. Common Troubleshooting
- If connection fails, verify the Endpoint and Region.
- If permission denied, ensure the sub-user has read/write access to Object Storage.
- Do not rename your bucket after setup; doing so will break synchronization.